How to create single or multiple signatures?
Mar 6 2020

A professionally designed email signature brings your business communication to a higher level, sets you apart you from the competition, promotes your business and nurtures your brand with every sent email. AdSigner provides a modern, unified and attractive signature design for all employees, with a diverse set of pre-designed templates.
To begin with the template selection and set-up, read the How to Choose and Edit Template blog. If you prefer video content, see the video tutorial.
Once the selected template is properly tailored to your business, it is ready for the end use. Take a look at how to create one or more signatures at a time from a template for a random number of employees.
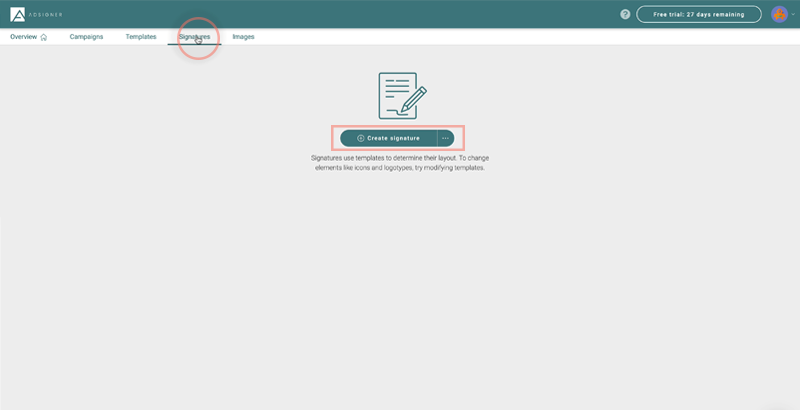
Step 1:
Start by clicking Signatures from the main menu bar and then click the Create signature button.
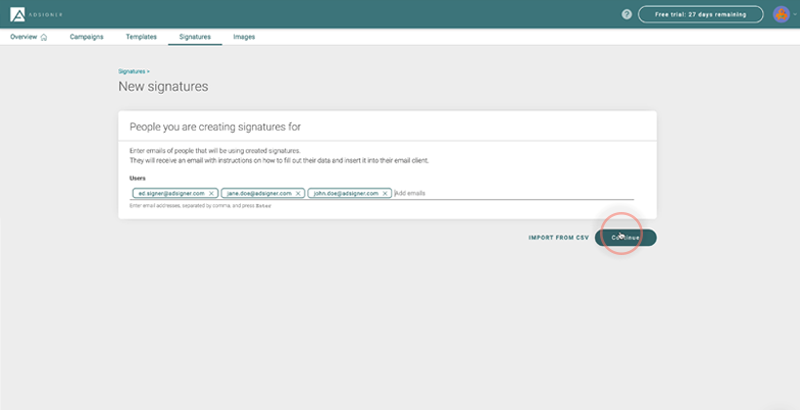
Step 2:
Enter one or more email addresses of those employees who will use an email signature based on the specific template. Separate each email address with a comma or confirm it by using the Enter key. Once you have entered all email addresses, click the Continue button to edit signatures. No worries, nothing gets sent at this point.
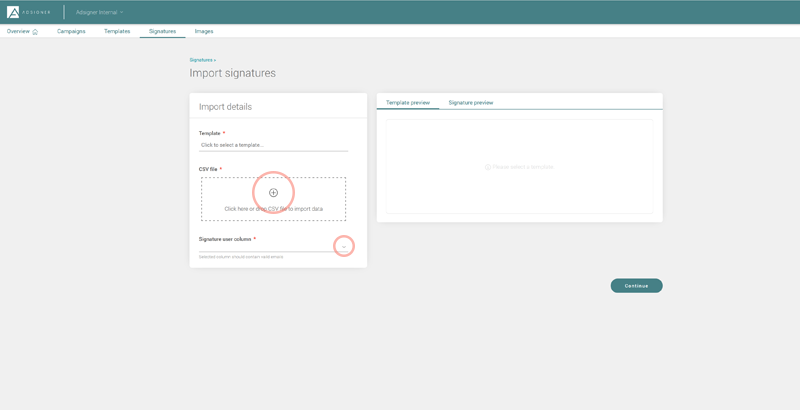
In case of a large number of users, the CSV feature will make it easier for you to enter both email addresses and individual user information. Simply combine them in a CSV document and name each type of information in the 1st line of the document (e.g. name, job title, telephone, email address etc.)
Download it using the Import from CSV button and continue by selecting the name of the column from which the email list should be drawn in the Signature user column field.
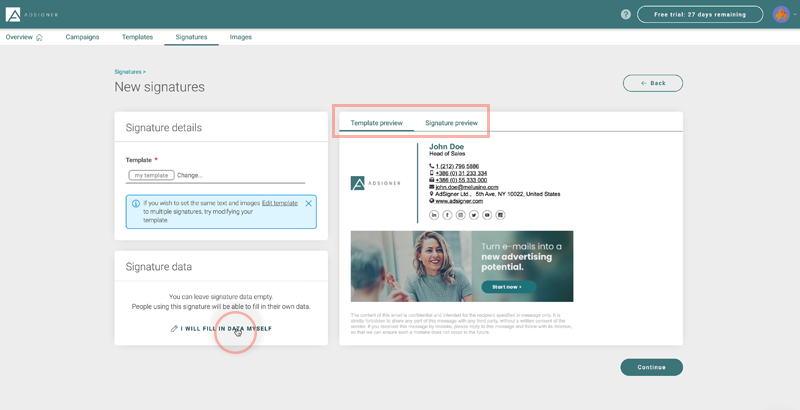
Step 3:
Click the Template field and select the template that will serve as the basis for your email signatures. Confirm your selection by clicking the Submit button. On the right side, a preview of the signature selected in the above list is displayed. Choose from a preview with (Template preview) or without (Signature preview) the entered sample data.
Instead of sample data, each signature will contain the personal information of the specific user. You can enter the data yourself by clicking on “I will fill in data myself” and selecting the signature you would like to edit. If you used a CSV document, you can select for each entry field a column from the CSV document, from where the system should extract the data content for each signature. The users themselves will be able to fill in all unlocked personal data fields in the template.
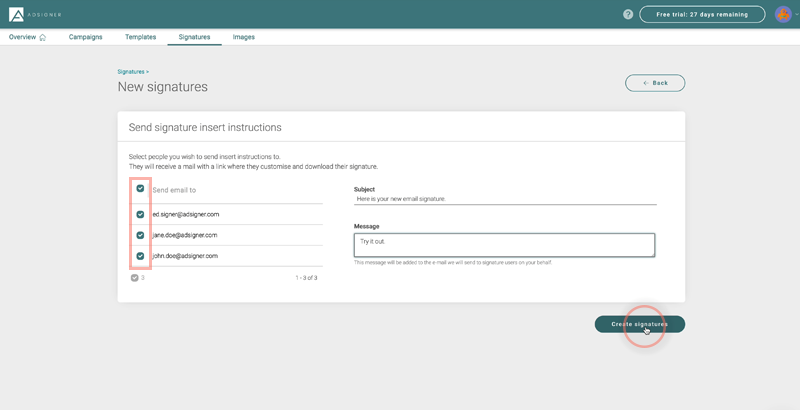
Step 4:
Once the signatures are ready, click Continue to further edit the message that you will use to send the set-up instructions to the users. Edit the message title and insert the content. If you do not want to send the notification to a specific user, remove the check mark in front of their email address on the left side. Click Create signatures to send an invitation with instructions for using the signature to all selected email addresses. That is all, your work is done.