Create a new campaign
Updating or launching new campaigns with AdSigner is quick and intuitive. Here’s how it works:
To Create a New Campaign:
-
Navigate to Campaigns in the menu bar
-
Click Create campaign
-
Name the Campaign
-
Groups & Signature - assign which Signatures or Groups of signature would you like to target with this campaign.
This enables you to target the same campaign to a specific group of signatures easily and to run various campaigns among different groups of users at the same time. By default, your campaign will apply to all signatures in your organization.
-
Upload your campaign banner (Standard dimensions: 940 x 300 px in PNG, JPG, or GIF format) The image will be contained and compressed to fit the template.
-
Add a destination URL where recipients will be redirected when they click the banner
-
Set your start and or end date to schedule the campaign a. Optional you can click on + Add and schedule banner update Read more: https://www.adsigner.com/user-manual/campaigns/manage-existing-campaign/
-
Save campaign - your new campaign is all set and will automatically replace the previous one
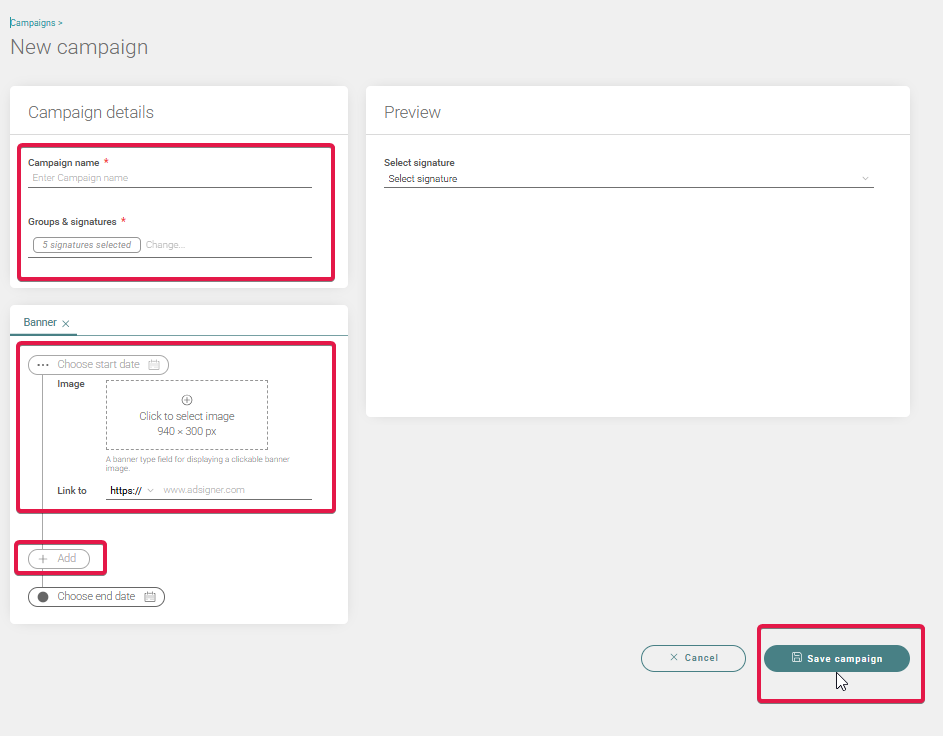
On the right side, you can preview any signature targeted by this campaign, and see how it will look through the duration of the campaign. Possible intersections and effects of other campaigns are also visible. This way, your campaigns will not overlap unintentionally.
The pending campaign will start automatically on the scheduled dates.
Campaigns go live based on the schedule you set. Once one ends, AdSigner automatically activates the next campaign in the queue.
Your scheduled banner will automatically update not only in future emails, but also in past and present email conversations.

