Set up a signature in Outlook live
To set up a signature for the Outlook live client, follow the instructions below.
Do not make any changes of a signature after pasting it in your email, as the predesigned form of the template might collapse. Update it in the AdSigner and set it up again in the email client.
- Sign in to Outlook.com.
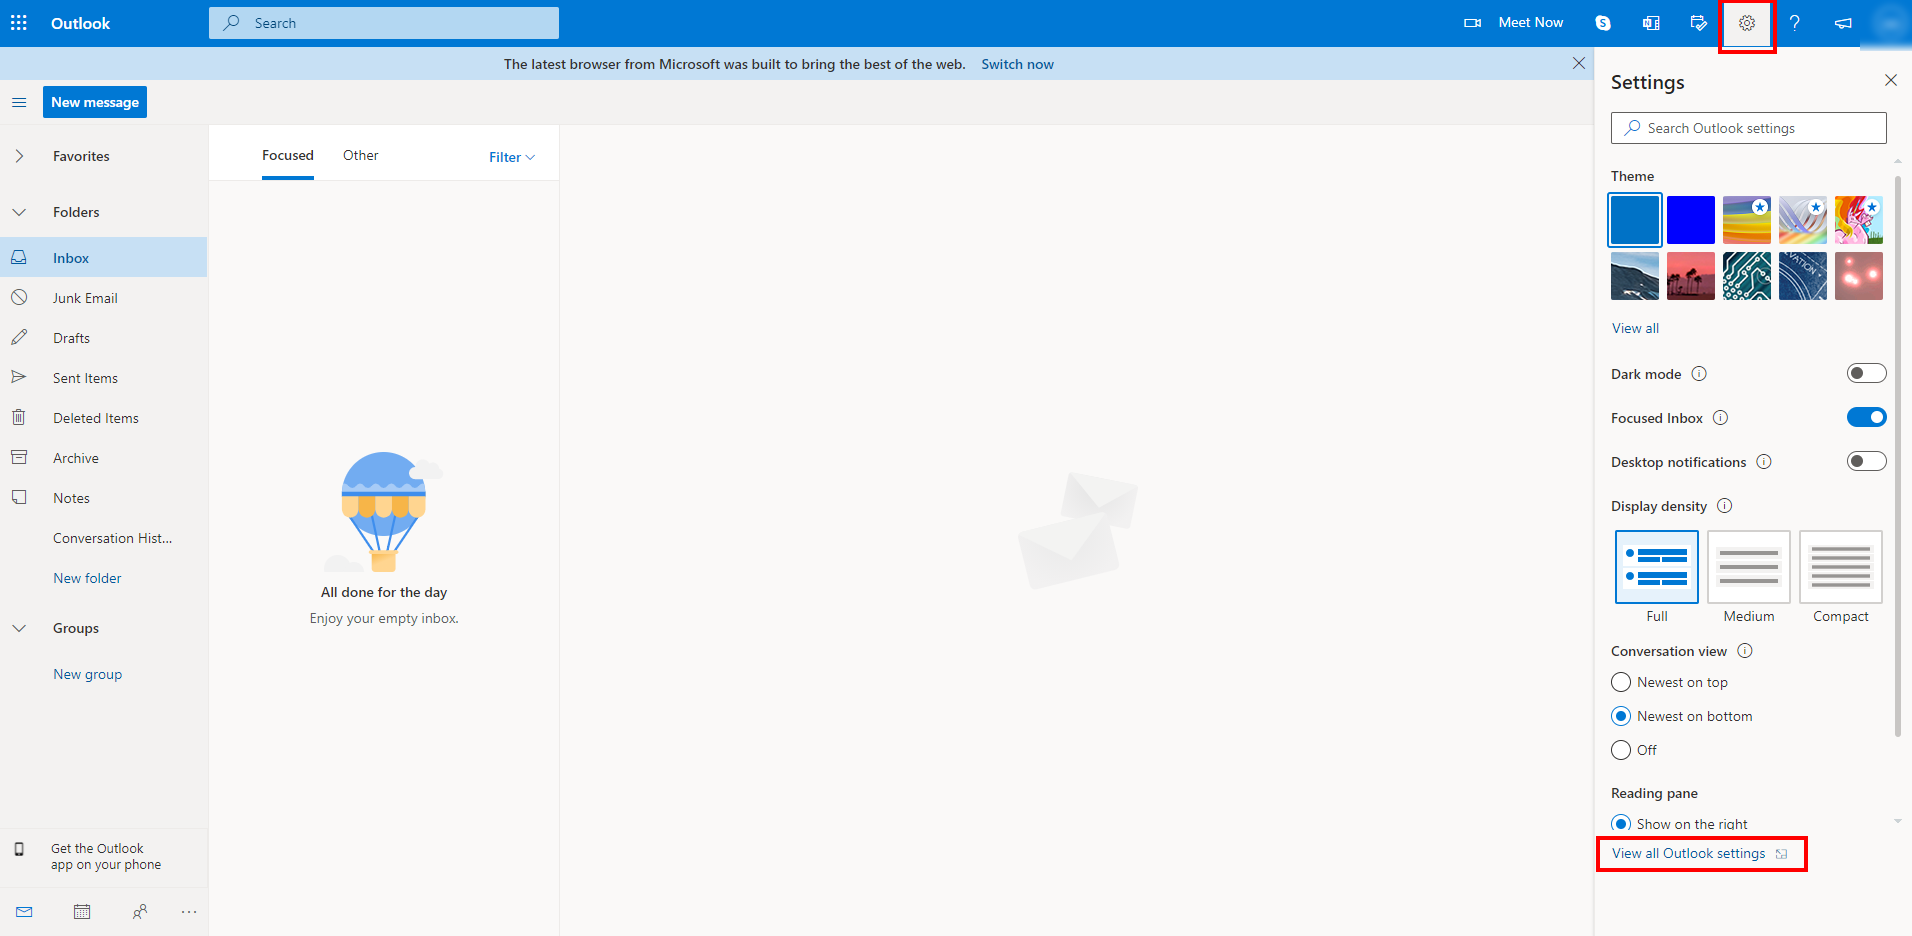
- Select the Settings tab at the top of the page > View all Outlook settings.
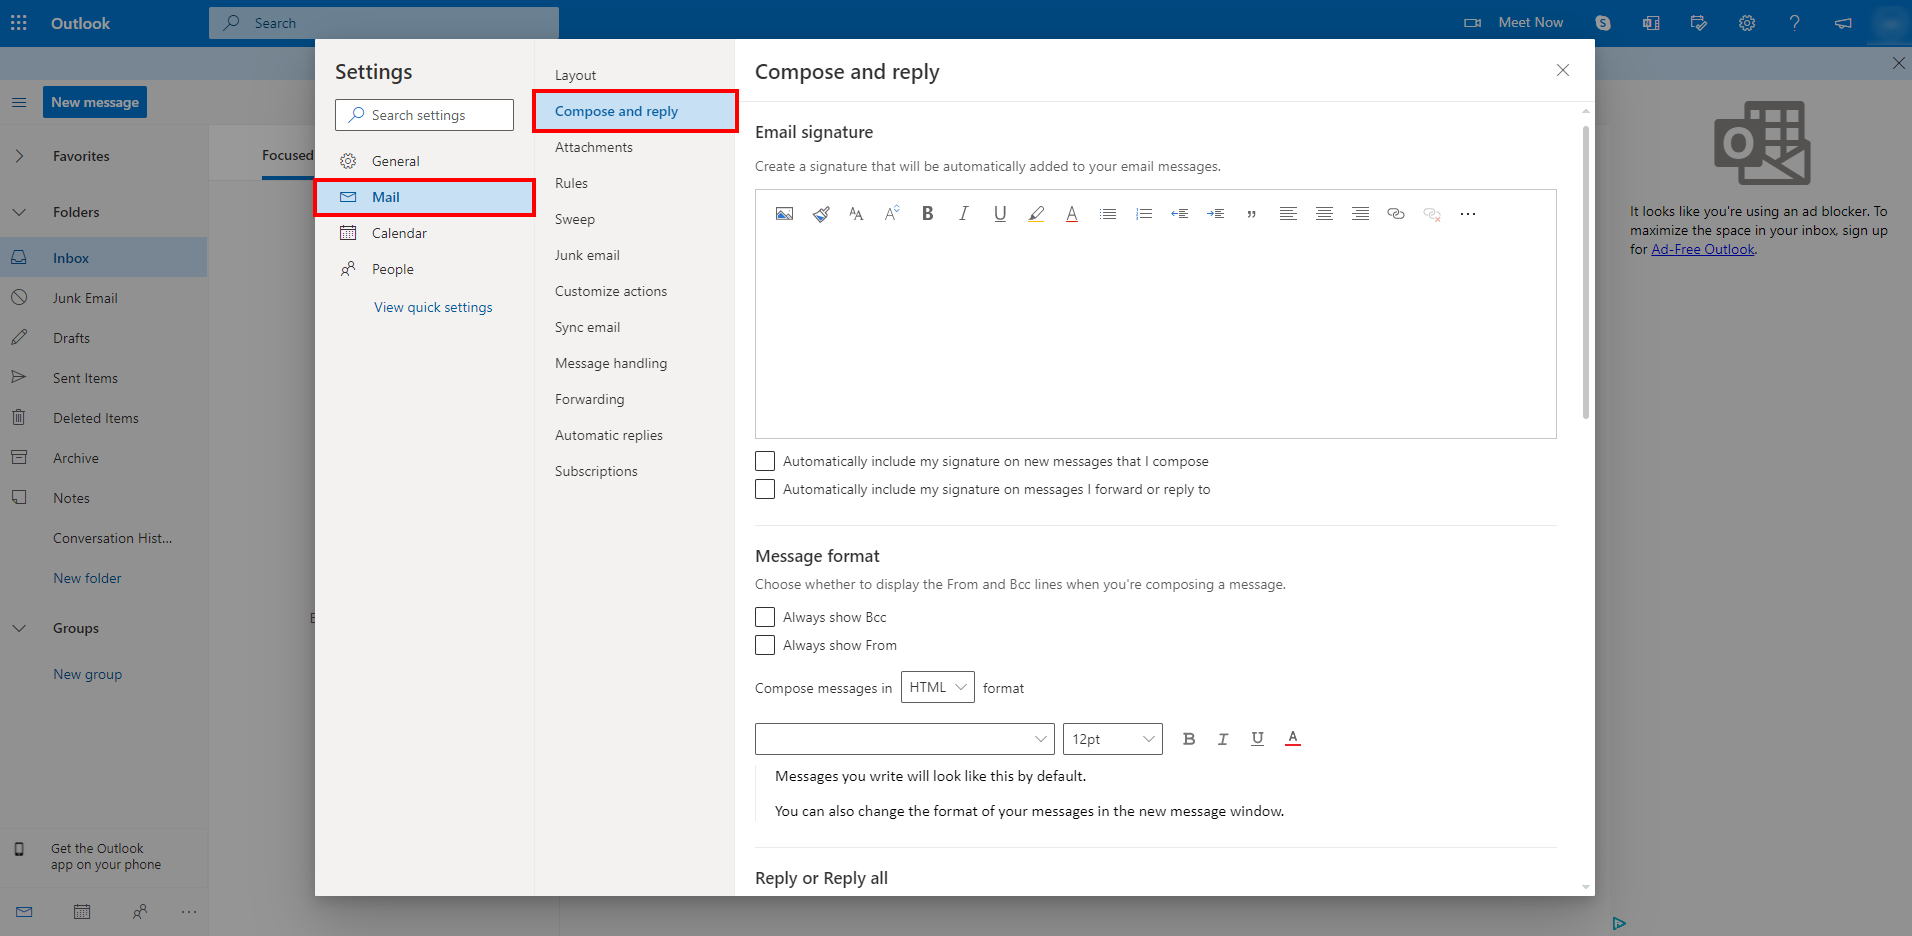
- Select Mail > Compose and reply.
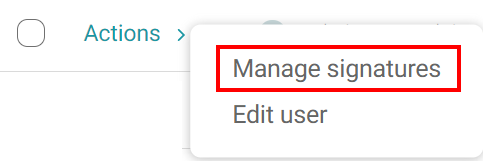
- Go to AdSigner > Users > Click Actions of the user, whose signature you would like to use > Click Manage Signatures.
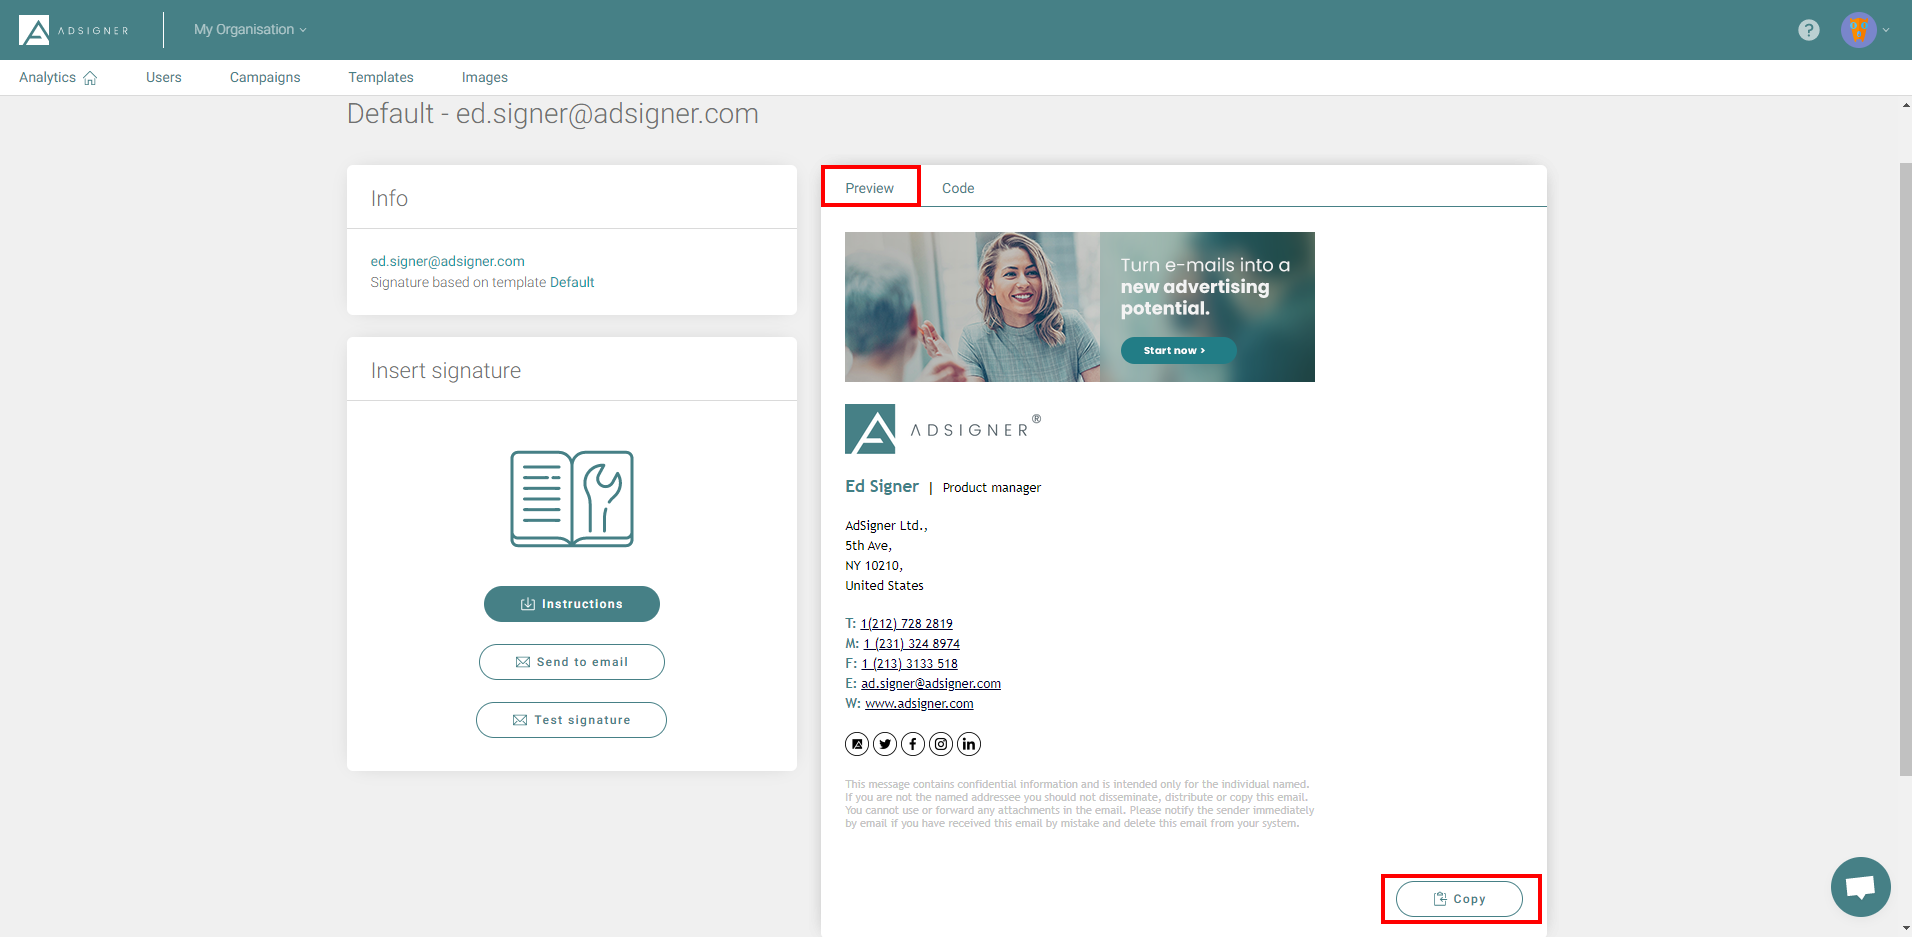
- Under the Preview tab, click the signature you would like to use, then press
 .
.
- Go back to Outlook.com and paste your signature in the Email signature blank box. Note: You can have only one signature per account.
- Select the:
Automatically include my signature on new messages I compose checkbox, if you want your signature to appear at the bottom of all new email messages composed by you.
Automatically include my signature on messages I forward or reply to checkbox if you want your signature to appear on your forwarded messages or replies.
If you don’t select these options, you can manually add your signature to a selected message when you write it.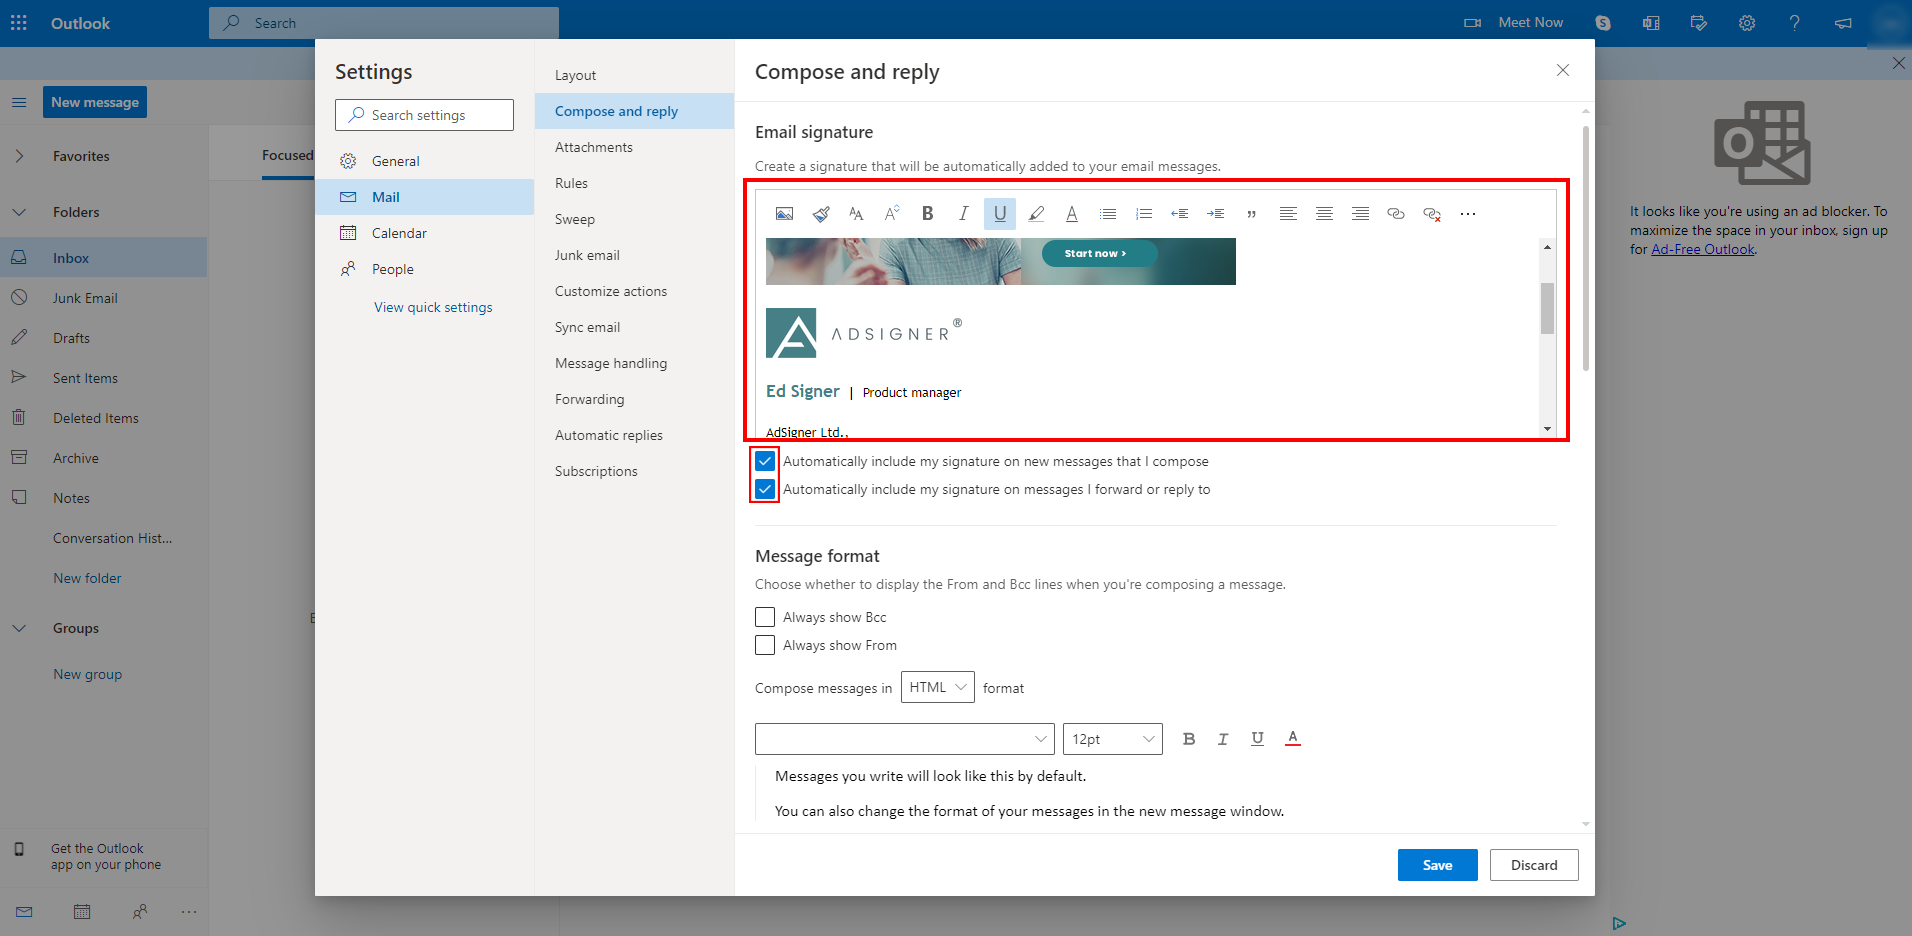
- Press Save.
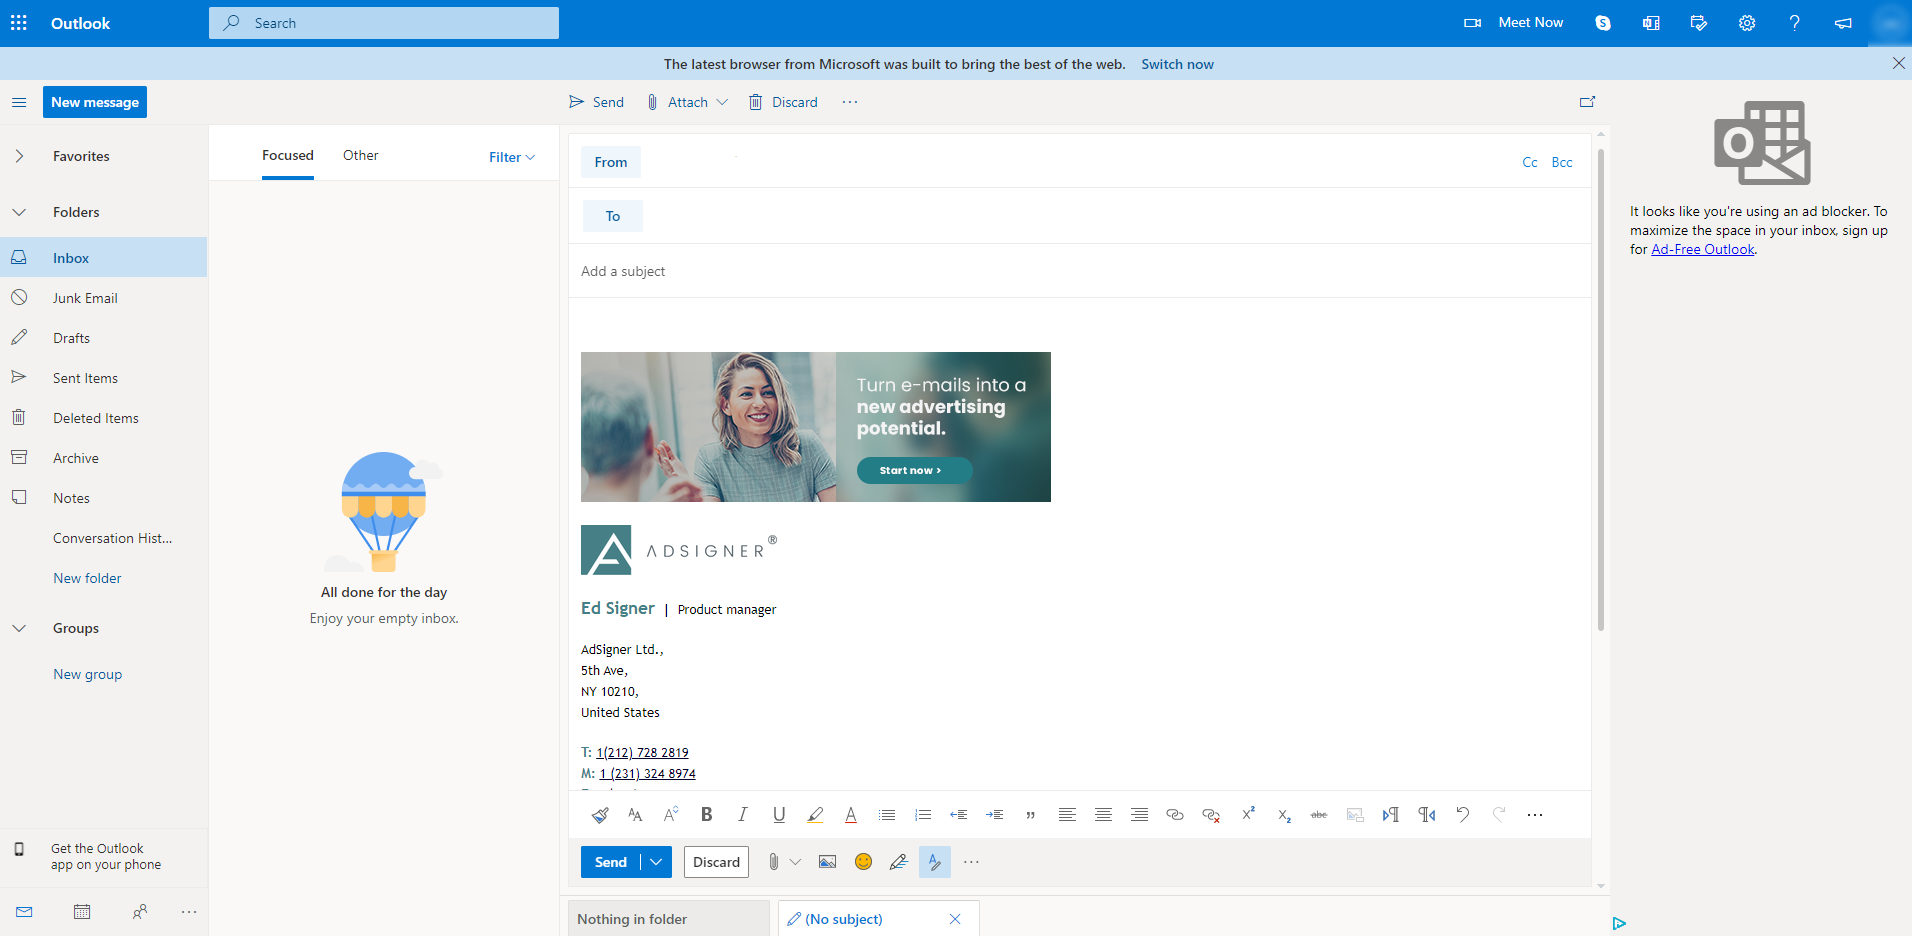
- When you compose a new email in Outlook.com next time, your new email signature should already be there.
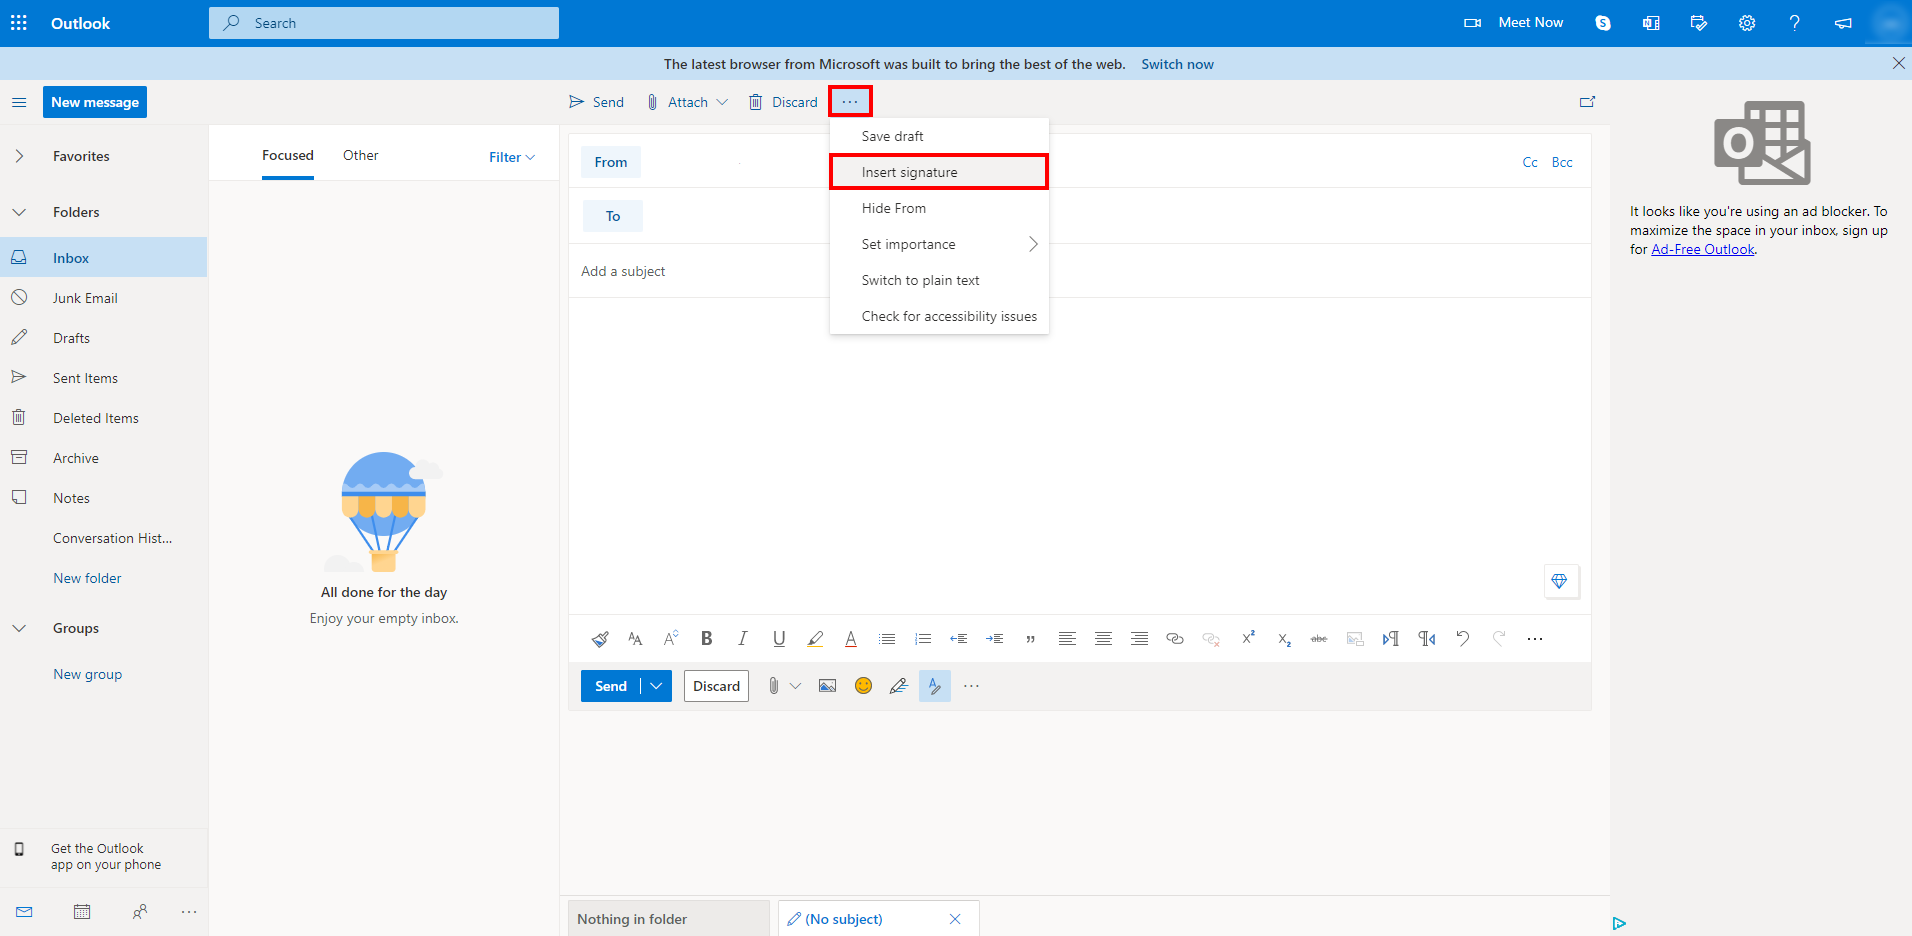
 Note: If you don’t choose to automatically add the signature to all outgoing messages, you can manually add your signature to a selected message when you write it. Go to your mailbox > Choose New message > Click on the three dots at the top of the compose panel > Choose Insert signature.